Elizabeth Yarnell Amazon icon Audible icon Autographed icon Bluesky icon Book Bub icon Buffer icon Booksprout icon Buy Me a Coffee icon URL Copied! Copy URL Email icon Facebook icon Goodreads icon Headphones icon Home icon Instagram icon LinkedIn icon Linktree icon Mastodon icon Patreon icon Periscope icon Pinterest icon Reddit icon RSS icon Search icon Share icon Snapchat icon Threads icon TikTok icon Tumblr icon Twitter icon Vine icon Youtube icon Join a free Q/A Call!

Can you prepare a Glorious One-Pot Meal ahead of time?

Reader question: Hi there! I heard you speak on Sunday at the library – great. I was wondering – can you fix the food in the pot and put in the fridge ahead of time and then put right in the oven when ready to cook? Or does it need time to warm up first before going in the hot oven? – Porter in Denver

Great question, Porter! In fact, the only thing that needs to warm up before you cook your Glorious One-Pot Meal is the oven. As you know, it is very important that your oven is fully preheated to 450 F before you put your Dutch oven inside, but the Dutch oven itself can easily move directly from your refrigerator into your oven without changing the amount of time the meal will need to cook.

Many GOPM cooks will layer the ingredients into the pot in the morning and then put it in the fridge until that evening when the oven is hot and ready to go. Just remember that if you are using any dry goods (i.e., pasta, rice, quinoa, barley, etc.), reserve the liquid needed to hydrate them and add it to the pot right before cooking.

Glorious One-Pot Meal with salmon, quinoa, sweet potato, zucchini, and mushrooms

Once I performed a cooking demonstration and afterward gave a full pot of raw food to my mother to cook as we had other dinner plans. She ended up waiting to cook the pot until the following evening. The recipe was Sesame-Soy Salmon with jasmine rice (it’s in my cookbook!). When I asked her how she liked the recipe, she answered, “It was delicious!”

And when I asked her how the rice turned out, she said,” Well… it was more of a rice patty than individual grains, but it was still delicious!”

So, if you’re preparing a GOPM in advance that contains a dry good, reserve the liquid to add at the last minute before cooking.

Oh, and one other thing: while your cast iron Dutch oven can go from fridge directly into the oven, it cannot go the other direction from being hot to being cold. Putting a hot cast iron pan into cold water is a good way to crack and ruin your pot, so be sure to always let your pot cool before cleaning it.

Gluten-free Chocolate Cupcakes

When I opened my second-grader’s backpack to insert his lunchbox on Monday morning, I noticed a flyer requesting home-baked goods for the bake sale Thursday night. A-ha! An opportunity to try out one of Elana Amsterdam’s recipes from her brand new cookbook, Gluten-Free Cupcakes by Elana AmsterdamGluten-Free Cupcakes: 50 Irresistable Recipes Made with Almond and Coconut Flour!

Flourless Chocolate Hazelnut Cupcakes

I spied this recipe from the book in the newspaper recently and have been just waiting for an occasion calling for cupcakes to try it out.

It can be tricky to bake wheat-free cakes, but I’ve tried Elana’s recipes in the past and had good success, though I think this recipe takes the cake (ha-ha). Simply delicious and so-o-o-o easy with only 6 ingredients! I baked them together with my 6-year old and then whipped together a simple butter/powdered sugar/vanilla frosting with a couple tablespoons of coconut milk added to thin it out.

The demand for the cupcakes started out slowly at the bake sale last night, but by the end of the evening’s activities, every single one had been sold and enjoyed. And my family, at least, was glad there was a yummy gluten-free option to munch on at the event.  🙂

Here’s the recipe for

[print-me target=”.recipe”]

Flourless Chocolate Hazelnut Cupcakes from Elana Amsterdam:

Ingredients

1.5 cups dark chocolate chips
1 cup hazelnuts
3 large eggs
1/4 cup agave nectar
1 Tbsp. vanilla extract
1/4 tsp. sea salt

Directions

Preheat oven to 350 degrees. Line 10 muffin cups with paper liners.

Combine the chocolate chips and hazelnuts in a food processor, and process until they have the consistency of coarse sand. Add the eggs and agave nectar, and pulse until combined, about 10 seconds.

Scoop 1/4 cup of batter into each prepared muffin cup.

Bake for 20-25 minutes, until a toothpick inserted into the center of a cupcake comes out clean. Let the cupcakes cool in the pan for 1 hour, then frost and serve.

My only variations: I doubled the recipe and made 1 dozen regular cupcakes and about 40 mini cupcakes. I left them in the oven a little too long waiting for the toothpick to come out completely clean; next time I will pull them out after 25 minutes no matter what. They were still yummy, though! 🙂

Quick and Easy Gluten-Free Pizza Crust

A few weeks ago I posted a simple recipe for pizza crust made from garbanzo bean flour, salt, oil, and water that I learned from Sandy Gluck on Martha Stewart Radio’s “Everyday Food.”

I was intrigued by the idea, so we tried it… and the whole family loved it (see the results and recipe here). So I’ve made it a few times since, every time with delicious results.

Here is a version I made this week where I poured the batter into the oiled pan and then spread marinara sauce around (more like flung it, because the batter is pretty runny in this recipe) and topped it with grated goat cheese (mozzarella and Monterey Jack) and mushrooms.

A few things I’ve figured out about this recipe, now that I’ve made it several times:
1. I use more chickpea flour (about 1 cup) and more water (about 1 and 1/2 cup) than the original recipe called for because I like to make a pizza that fills my entire 14″ diameter round cast iron griddle.

2. Be sure to let the batter sit for at least 30 minutes before using it or else the crust will have a mealy texture.

3. It’s important to preheat the cast iron pan and then to spread a generous amount of oil right before pouring the batter around evenly. I’ve been using olive oil for this, but any oil would do.

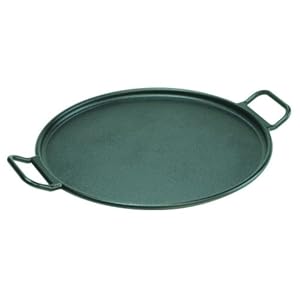
cast iron round griddle
We use our round cast iron griddle for everything from pizza to pancakes and dumplings to burgers.

4. The batter will seem really runny when you’re pouring it in. That’s ok. It may not self-level because it starts to cook as soon as it hits the hot oil, so try to spread it around evenly when you pour it into the pan. When it’s too thick, the crust is too dense and heavy.

5. Keep the pizza in the oven until the bottom is lightly toasted. This may take longer than 15 minutes, depending on how heavily you’ve loaded it with toppings.

We love the thin, crispy crust on this paper, reminescent of the addictively-crunchy, wood-fired crispy pizza crusts I adored during the year I lived in Florence, Italy.

Other benefits of this recipe: it’s yeast-free and doesn’t rise, so it is safe for Passover; it’s gluten-free and wheat-free, so it is safe for Celiac sufferers; it doesn’t require any fresh foods, so it’s easy to pull together in a minute and top with whatever you have on hand (see this recipe with artichoke hearts and green chiles), or even simply sea salt and spices for a cheese-free flatbread.

All-Natural Easter Egg Dyes

Take your Easter tradition natural with these quick and easy natural dyes to make your Easter eggs festive without making them toxic with petroleum-based food dyes.

Orange dye: 2 cups water, 2 tbsp distilled vinegar, 2 tbsp paprika
Blue dye: 2 cups water, 2 tbsp distilled vinegar, 1  cup blueberries
Pink dye: 2 cups water, 2 tbsp distilled vinegar, 1 cup chopped fresh beets
Green dye: 2 cups water, 2 tbsp distilled vinegar, 1 cup blueberries and 2 tbsp turmeric

For all dyes, bring dye mixture to a boil, remove from heat and cool and strain liquid into a medium bowl. Submerge 4 to 6 hard-cooked eggs in dye for up to 30 minutes, depending on how deep you want the color to be. Remove from dye and place on a cooling rack to dry and drain. Store in refrigerator until ready to use.

Here’s another method used for dyeing and decorating blown eggs with natural, homemade dyes for beautiful eggs that are works of art.

The HGTV Green Home comes to my neighborhood!

This year’s HGTV “Green Home” contest is offering a sustainably-built home for sustainable living right here in my neighborhood. My friend, Gail Fenton, HGTV’s “Superfan”, gets the lucky job of filming the special details of the HGTV homes, and caught up with me to talk about how what it is like to live in this fabulous neighborhood.

Check out my Stapleton Green Home video here by scrolling to find “What’s Great About Stapleton “!

HGTV 2011 Green Home Stapleton Colorado
HGTV 2011 Green Home in Stapleton, Denver, Colorado