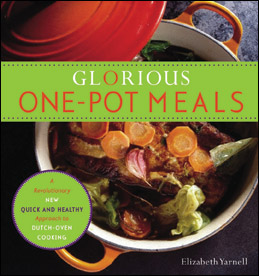
Stop right there! Save that pre-packaged mix for another time. Instead, purchase a cheaper bag of plain, raw cous cous, or scoop it out of the bulk foods bin at the health food grocery store like I do. Following the instructions in the recipe, or in the Common Measurements section of the Glorious Pot Meals cookbook, guarantees perfectly cooked grains every time. Following the instructions on a prepackaged box will add too much water, too much oil, and too many preservatives to be effective in a Glorious Pot Meal.
FAQ Category: Questions About Glorious One-Pot Meals
I forgot to take out the chicken for tonight’s Glorious Pot Meal (I’m making Chicken Cacciatori)! It’s frozen solid – what should I do?
Relax, frozen meats work perfectly fine in Glorious Pot Meals — there is no need to think ahead for thawing! As long as the frozen meat fits completely inside the pot, you’re fine. If you need to separate two pieces of meat that are frozen together, put them into a sealed baggie and run under cold water until they can be pulled apart. Frozen bone-in meat, such as chicken legs, may require your Glorious Pot Meal to spend an extra 5-10 minutes in the oven to completely cook. Don’t forget: let your nose be the guide! You’ll know a Glorious Pot Meal is done about 5 minutes after the aroma first wafts from the oven.
Can I make my Glorious One-Pot Meal ahead of time and bake it the next day?
Most Glorious One-Pot Meal recipes can be layered the night before, kept in the fridge, and then put directly into a fully pre-heated oven for the normal amount of time. The only time this becomes an issue is when you are using a dry good such as pasta or rice. If the pasta or rice sits in the liquid overnight it will become a gummy patty. Instead, try just adding the dry ingredient when you’re building the meal and then pouring in the hydrating liquid just before it goes into the oven.
Help! I burned my Glorious One-Pot Meal! What did I do wrong?
While it’s hard for me to tell exactly what happened without more information, I can provide a couple general pointers to help you avoid this fate in the future.
1) Every oven is a little different, and cooking times may vary depending on if you’re using fresh or frozen ingredients or even the thickness (or absence) of meat, so perhaps you simply left it in the oven too long. No matter what the recipe says the cooking time should be, your nose should always take precedence in deciding when a Glorious One-Pot Meal is done. The general rule of thumb is that the meal is ready about 3 minutes AFTER the aroma first escapes from the oven. At this point you should smell what I call a “full-bodied scent” that will probably make your mouth water and will definitely make your house smell inviting.
2) Be sure to use the correct ratio of water to grains. This is the most scientific part of the Glorious Pot Meal cooking method, and the one you will most benefit from my own trial and error development process. Whether the recipe calls for rice or pasta or quinoa, I will supply you with the correct proportion of liquid to grains so that your grains will be tender, fluffy, and fully cooked instead of hard, chewy, or scorched. The Glorious One-Pot Meal cookbook provides a handy table of ratios for using almost any grain in any form.
How will I know if my Glorious One-Pot Meal is done?
You’ll know a Glorious Pot Meal is done about 5 minutes after the aroma first wafts from the oven. NEVER crack the lid too soon. Glorious Pot Meals use what I call an “infusion cooking process”, wherein the liquid from the vegetables heats to cook the rest of the food. Opening the lid allows too much steam to escape and slows the cooking process. This is why it is essential that your dutch oven has a lip on the underside of the lid to form a tight seal.

